
I spent lots of time figuring out the best recipe for building out an Amazon EC2 instance that would support nginx as my http reverse proxy and node.js web app builder. These steps detail what I’ve found to be a “winning path.” I will start with the disclaimer that not only am I not a Linux power user, but I am also new to nginx. Hence the amount of time I spent working on different combinations. Please follow these directions at your own risk, I do not provide them with any warranty, just for the sake of perhaps saving another newbie some time and because all the tutorials of sorts that I followed didn’t seem to sync up with my real experiences.
- Launching an Instance
NOTE: If you’re familiar with launching instances in Amazon’s cloud, you can probably just skim through this until you get to the section on installation and configuraiton.
####Choosing an AMI
You’ll start by launching the Request Instances Classic Wizard. I’ve experimented with Amazon Linux AMI 2013.03.1, Red Hat Enterprise Linux 6.4 and Ubuntu Server 12.04.2 LTS. Of the three, I’ve had the best experience with RHEL. Amazon Linux had an outdated nginx in their repo, and I had problems getting Ubuntu configured correctly.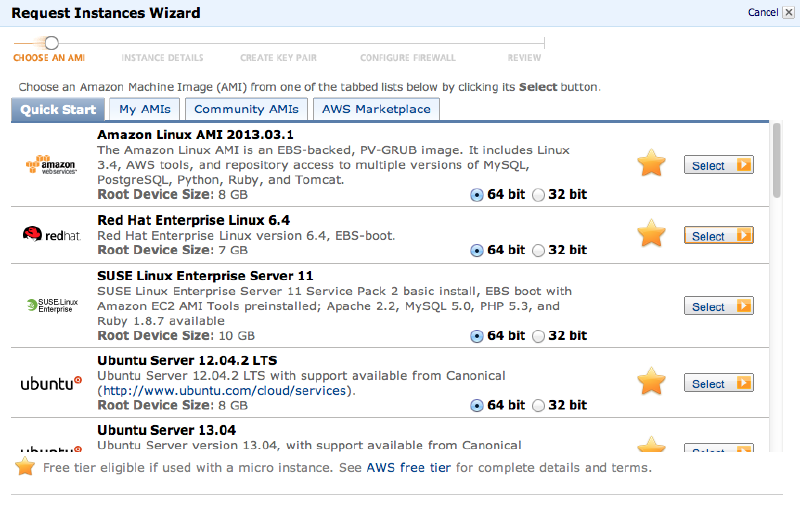
####Selecting Instance Details
Once you’ve selected RHEL6 64bit you’ll setup the instance details. RHEL6 (at the time of this post) is in the free teir with the micro instance, but for the sake of time, I’m going to go with an m1.small. Note: most instance details don’t really matter in the setup process as we will ultimately be setting up an AMI (Amazon Machine Instance) and when launching an AMI you get to choose whatever instance details you would like for that specific instance.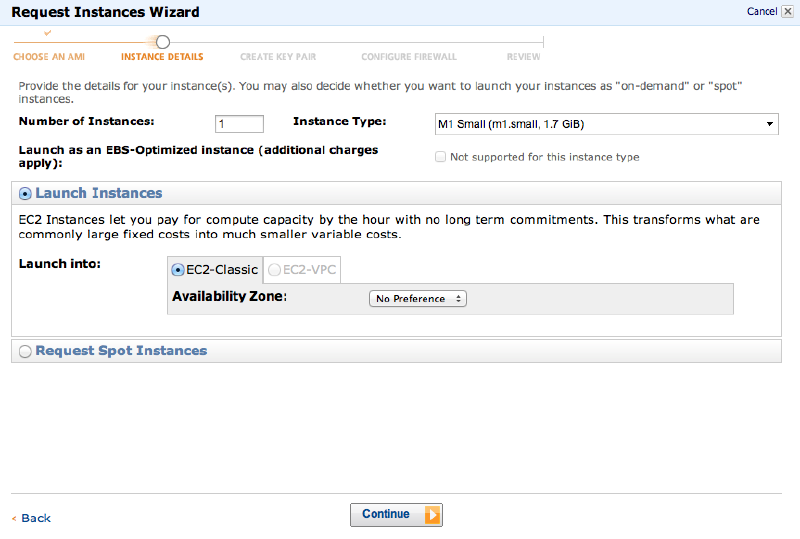
Next we can breeze through the next few screens because the default values suit our purposes for now. I tend to add a helpful name of sorts in the ‘Name’ value (as seen below) since I have quite a few Amazon instances.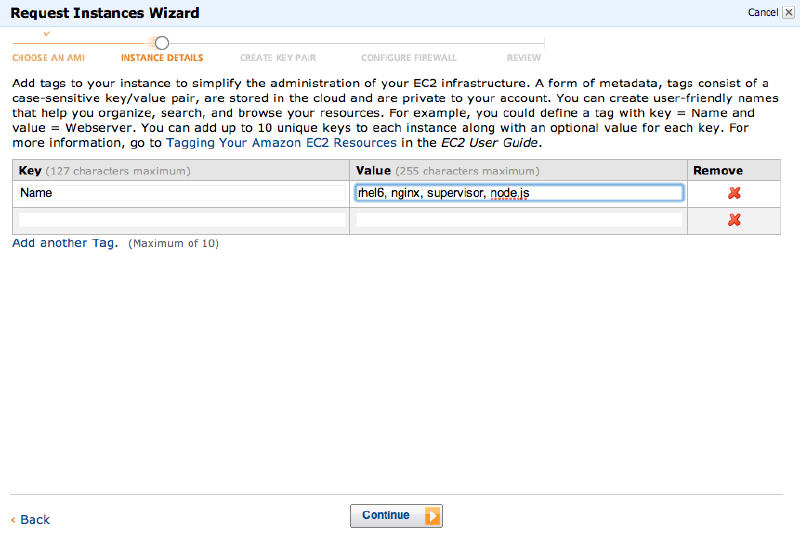
####Selecting Key Pair This section may require a little background knowledge on Amazon key pairs. I recommend you google that a bit before continuing if the following doesn’t make sense to you:
Public/private key pairs allow you to securely connect to your instance after it launches. For Windows Server instances, a Key Pair is required to set and deliver a secure encrypted password. For Linux server instances, a key pair allows you to SSH into your instance. To create a key pair, enter a name and click Create & Download Your Key Pair. You will be prompted to save the private key to your computer. Note: You only need to generate a key pair once - not each time you want to deploy an Amazon EC2 instance.
I choose a key that I had previously setup here. If you haven’t made one, or only have one that you know you shouldn’t use, you should take this moment to create a dev, play, sandbox, or config keypair just to get you through the setup process. Again, this is something that you can change when launching this as an custom AMI later.
####Configuring Firewall
This is another area that will get you if you don’t understand the role of the amazon instance firewalls. Just like any other firewall, they block all ports and originating IPs that are not specified as allowed in the firewall policy. These firewall policies are stored in what Amazon calls Security Groups. Wether you’re selecting an already created security group or creating a new one, the key ports that should be open are as follows: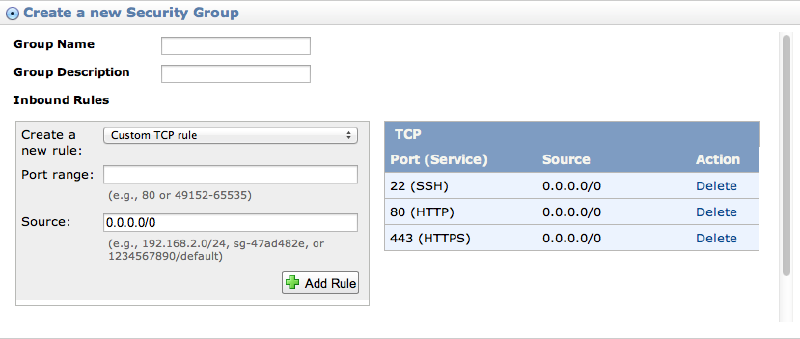
####Review After reviewing your instance creation details you can launch it, wait a small bit, and then move on to the next step!
- Connecting to Instance via SSH
Once the machine is launched and in a ready state, we can SSH into it.
- Right click on the running instance
- Click ‘Connect’
- Expand the ‘Connect with a standalone SSH Client
- Follow those steps… (they’re pretty good steps, Amazon even tells you practically exactly what your SSH statement should be)
I’m using iTerm on a mac, and if you aren’t you should be too, only because it’s excellent.
- Turning off RHEL firewall
Ok, so I mentioned earlier that since this is sitting behind an amazon firewall, there really isn’t a need for the RHEL firewall. Heck, Amazon Linux and Ubuntu didn’t even have one enabled by default! So, for our purposes, we’ll disable this. (Note the superuser priveledges, if you’re new to linux, sudo su is the command your looking for. You know you’re super user by the #)
# service iptables save
# service iptables stop
# chkconfig iptables off- Installing nginx
First note, nginx is not in the default package repositories, so we’ll have to add it.
Second note, you can download and build nginx yourself if you want the latest features and bugfixes, to do this you can checkout their wiki. However, for our purposes, nginx version 1.4.1 is fine for us (it’s got the included support for web sockets wich is important if you wan’t to use something like socket.io for node.js)
####Creating the package repository file for yum
NOTE: I’m going to use nano throughout this tutorial for 2 reasons: 1) It’s the easiest for someone not use to terminal text editing. 2) I think it’s a fine tool for non-complex text editing tasks.
Create a file named /etc/yum.repos.d/nginx.repo and use the following configuration
$ sudo nano /etc/yum.repos.d/nginx.repo
Note, this must be sudo because of the permissions required on that directory
[nginx]
name=nginx repo
baseurl=http://nginx.org/packages/rhel/6/$basearch/
gpgcheck=0
enabled=1
Also, if you’re new to nano, after you’ve pasted this text into the editor, you’ll do ctrl+o to write out to the file, then hit enter (because we already specified the file name when we started nano), and then ctrl+x to exit nano. Remember this, you’ll do it again.
To verify that the repo file is correct, you can search for the package yum search nginx and you should get some results
####Installing nginx via yum
sudo yum install nginx
After executing that command, yum will figure out everything that needs to happen, and prompt you with ‘Is this ok [y/N]:’. Type ‘y’ and hit enter and off you go.
You should see something like this, verifying nginx version 1.4.1 was installed: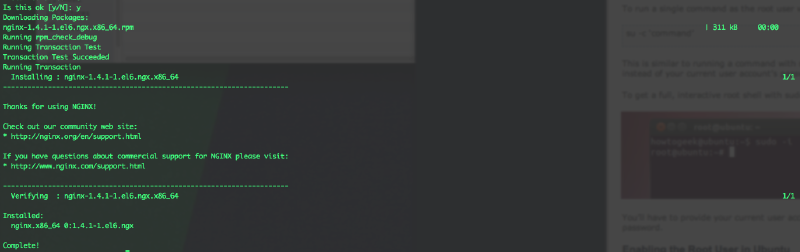
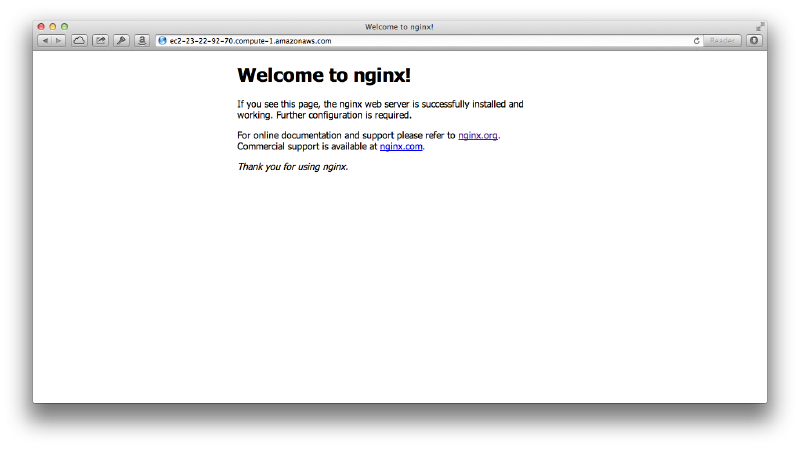
####Verify nginx is working With the rhel firewall turned off, and the security group firewall configured as mentioned earlier. You should be able to run nginx and see that it works!
First, start nginx: $ sudo nginx you shouldn’t see anything if everything was successful.
If you’ve stuck with me this far, you should be able to navigate to your instance using the public domain name found in the EC2 Instance details on the EC2 area of the AWS Console. You’ll see something like this:
- Configuring nginx
Now that we have nginx up and running, we can familiarize ourselves with configuration. Nginx has a concept of server blocks for configuration that represent ‘sites’ (for the sake of this tutorial). You can have many different server blocks that are nested inside an http block.
Nginx’s configuration structure is setup like so (by default):
- Master configuration file:
/etc/nginx/nginx.conf - Server block configs:
/etc/nginx/conf.d/*.conf
We’ll want to create a new server block configuration (and delete the default.conf file since we don’t need that anymore). Since I’m going to be setting up node, I’ll call it /etc/nginx/conf.d/node-myapp.conf with the following contents:
#the IP on which your node server is running, 127.0.0.1 for local of course. I chose port 8080 as the listening port for node
upstream node-myapp {
        server 127.0.0.1:8080;
}

#the nginx server instance
server {
        listen 80;
        server_name _;
        access_log /var/log/nginx/node-myapp.log;

        # pass the request to the node.js server with the correct headers and much more can be added, see nginx config$
        location / {
                proxy_set_header X-Real-IP $remote_addr;
                proxy_set_header X-Forwarded-For $proxy_add_x_forwarded_for;
                proxy_set_header Host $http_host;
                proxy_set_header X-NginX-Proxy true;

                proxy_pass http://node-myapp/;
                proxy_redirect off;
                proxy_http_version 1.1;
                proxy_set_header Upgrade $http_upgrade;
                proxy_set_header Connection "upgrade";
        }
}
There are a few things to note in the configuration of this server block.
- I set the
server_nameto_. This means that all nginx server traffic will go here as ‘best match’. - The last 3 lines inside the location section are important for websockets. Which I am utilizing and are only supported in later versions of nginx like the one we’re using in this tutorial.
We can leave the nginx.conf alone for now. To make these
- Installing Node
Some prefer to download node via git others prefer to use the package manager. In this case, we’re going to install node from a package manager. This is to avoid issues with compiling (this version of RHEL either doesn’t have a C compiler installed or it’s not in a standard location). In order to get node from a package manager we have to enable EPEL. To do this, follow these commands:
$ su -c 'rpm -ivh http://mirror.pnl.gov/epel/6/i386/epel-release-6-8.noarch.rpm'
Then insure it’s configured correctly with this:
$ yum repolist
Now you should see epel in that list.
Finally, we can install nodejs via yum with this command:
$ su -c 'yum install nodejs'
- Getting Node up and running
You’ll need somewhere to put your node assets, and I recommend the following: /var/www/node-myapp.
This will keep a nice consistent experience for your node apps and nginx server blocks.
For the sake of having a node app that does something (if you don’t have one to play with). You can use the following ‘hello world’ code:
var http = require('http');

http.createServer(function (req, res) {
    res.writeHead(200, {'Content-Type': 'text/plain'});
    res.end('Hello World\n');
}).listen(8080, "127.0.0.1");
console.log('Server running at http://127.0.0.1:8080/');
Place this in /var/www/node-myapp/app.js
Now we can test out the whole experience. First, make sure nginx is running and listening to port 80 (you can do something like this $ sudo lsof -i :80). Then start node like so:
# cd /var/www/node-myapp
# node app.js
Then when you send requests to the public domain for your instance you should see your hello world message! Vioala!
- Supervisord: taking node to the next level
So now that we know how to setup nginx, and we’ve figured out how to get nginx to proxy to our node app, let’s think about resilliancy. There might be two things that are going on in your mind through this tutorial: 1) node is not a daemonized process, and that’s pretty limitting to me 2) what happens if node crashes??
This is where supervisord comes in handy. It will handle daemonizing your node process as well as reliably monitoring it and restarting it if necessary. Here is how to get supervisord set up in our environment. (for more advanced documentation, checkout supervisord)
- Install supervisord:
# easy_install supervisor - Setup default supervisor.conf file
# echo_supervisord_conf > /etc/supervisord.conf - Add node as program to supervisord.conf for the sake of the tutorial I’ll paste what I put, but the echo_supervisord_conf is pretty extensive and just about as good as supervisord’s documentation
[program:node-myapp]
command=/var/www/node-myapp/node_modules/coffee-script/bin/coffee app.coffee ;this is because my node app is in coffeescript
directory=/var/www/node-myapp
autostart=true
autorestart=unexpected
startsecs=2
startretries=3
exitcodes=0,2
stdout_logfile=/var/www/logs/node-myapp.log- start supervisord:
# supervisord -c /etc/supervisord.conf
###SUCCESS!
Now, when you reboot your machine, supervisord will be configured to start automatically need to be started, and because we set autostart to true for our node-myapp program, it will also start as a daemon automatically as well. It’s also worth noting that nginx will start at reboot also, but you may want to consider adding nginx as a process that’s monitored by supervisord as well. There are many more complicated things you can do with supervisord now that you have this foundation.
Good luck!
Basic Troubleshooting#
###Supervisord
Supervisord is controlled by supervisorctl. You can enter into this control tool by just starting
# supervisorctl. This will give you a supervisor prompt. Typinghelpwill give you a list of commands to guide you through troubleshooting, andstatuswill give you some insite into wether or not your app is even running correctly (helping identify errors in the supervisord.conf program section).
###Nginx
When you make changes changes to the server blocks while nginx is running, you may have to reload it. To do this, use the command
# nginx -s reload. You can pass other signals after the-sflag as well to aid in troubleshooting.
###No 502, no anything…
Check to make sure your security group is set up correctly with the correct ports opened. If not, you may not even see anything when you’re attempting to access your ec2 server by public domain via a browser. NOTE: rules can be added to a security group that take place nearly instantly while an instance is up and running, but security groups cannot be added or removed after an instance is launched.
Also, check to make sure the RHEL6 iptables are turned off so the local firewall isn’t causing you some heartache because you’ve assumed it’s not on in the first place.