Critical Note/Edit [Risk of Fire] #
If you see in the photos below, I’m using molex-to-sata power adapters for the GPU risers. As pointed out by a fellow reader, molex-to-sata power adapters can potentially be fire hazards! It’s important to take a close look at the type of molex-to-sata connector that you have if you’re going to use it in your build. Here is a great youtube video by Mark Furneaux covering different types of connectors and risks (the link starts at the type of connector that is a definite fire hazard). In fact, the molex-to-sata connectors I used in the pictures of this build are examples of connectors that could potentially pose a fire risk, I replaced all these connectors during the scale-up of my farm. Better still, I stopped purchasing GPU risers that didn’t have direct SATA power connectors on-board. This has eliminated the need for cable adapters.
Thanks to Jonathan for pointing out the risk.
Introduction #
If you haven’t already checked out Part 1: Equipment or Part 2: Base Computer Assembly I recommend going back and reviewing those posts in order to build the context for this GPU Installation, BIOS Config and First Boot post. Here we’ll continue our rig assembly all the way to first boot. In a future post, I’ll discuss tunning techniques and challenges as well as a bit on handling energy and heat constraints on scale out.
Preparing for GPU Assembly. #
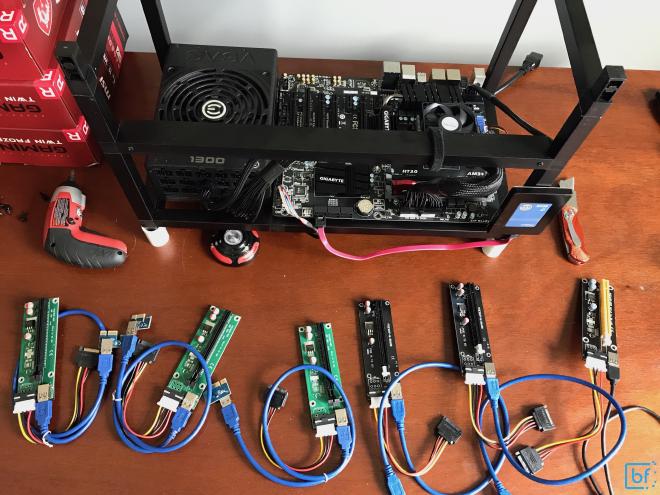
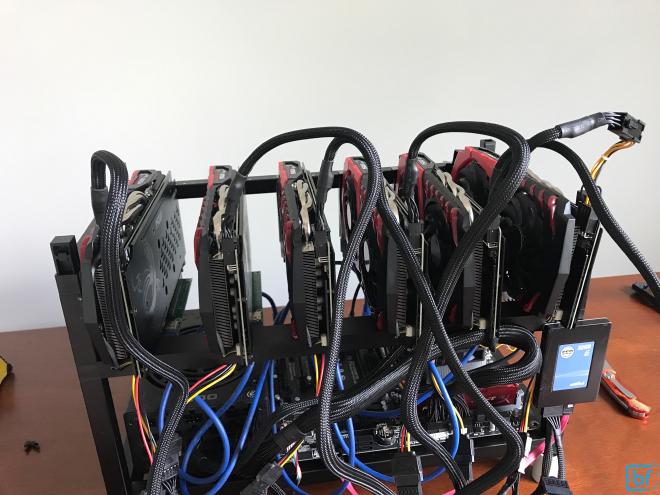
Up until this point, sans the frame, we’ve pretty much been building a vanilla computer. The GPUs and GPU assembly is what will make this vanilla computer a GPU hash-mining machine. First, you’ll want to unpackage all of your GPU risers and go ahead and assemble them (attaching the Molex-to-SATA power connectors and the USB to PCIe x1 interfaces)
Here I’m using 6 risers made by 3 different manufacturers. I’ve tested quite a few, and the risers that I’ve linked in the Part 1: Equipment post have been generally reliable for the price. That said, like most custom assembled hardware, manufacturing and supply constraints cause potential shortages and as such, I’ve expanded to a few other GPU Risers as well. In general, most GPU risers are created equal, so long as they have on-board power connectors. The biggest source of quality issues are in the interface mounts for USB as well as the PCIe x16 and power management components. Reviews are your friend here. Make sure to purchase spare parts as you can expect some failures. You may have DoA components or you may experience failures over time, so, having a few in your spare components chest will serve you well.
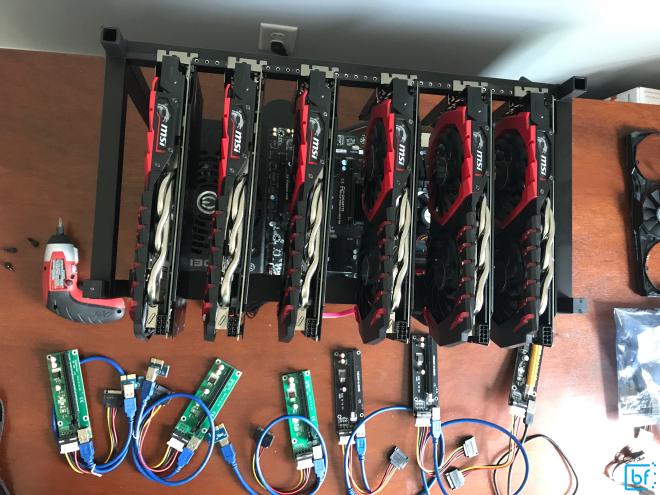
Next, we’ll go ahead and unbox all of our GPUs. Keep in mind, the GPUs collectively make up the most expensive component to a GPU mining rig. They also are potentially re-usable if treated carefully and not over-worked. Because of their re-purpose-able value, you’ll want to keep the static bags, boxes, packing material, etc so you can either re-purpose yourself or sell should you wish or should GPU mining become infeasible in the future. In my experience, out of all the GPUs I’ve tested, the MSI Gaming line have a side benefit of being the best packaged GPUs as well. This adds additional value in recyclability and time-to-unpack.
In this step, we’ll want to set the boxes aside and prop the GPUs on the rig frame leaving all the protective coverings on the GPUs.
Note that I’ve removed all the supplied GPU mounting screws from the rig frame in advance of staging the GPUs on the rails. I’ll keep the GPUs safely on the rails while I take each GPU off, one-by-one and assemble them with their respective GPU riser.
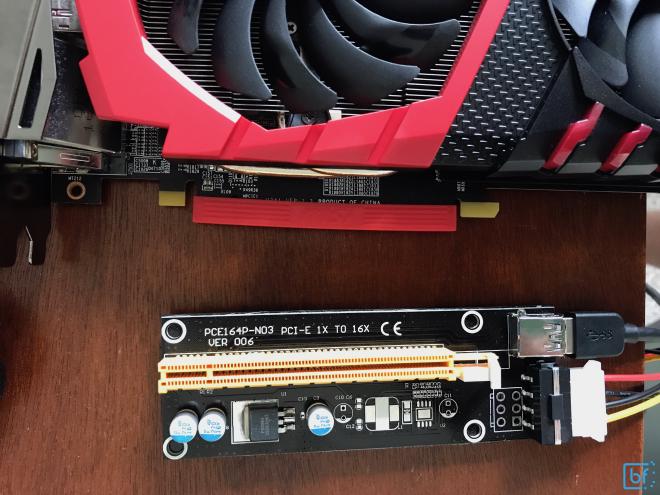
In order to connect the GPU with the riser, we’ll need to remove the red protective PCIe x16 cover from the GPU, unlock the PCIe slot (if the slot has a lock, some do not, and many are different) and then line up the key holes.

Slide the GPU into the socket and secure the locking mechanism
Note: If the GPU riser has a slider like pictured, locking it is just a matter of sliding the slider towards the socket to lock. I’ve seen other locking mechanisms like the motherboard memory slot locks that need to be depressed to unlock and will automatically lock when the GPU is slid into place or can be lifted to lock the GPU.
Once the GPU is locked it should look something like the following figure:
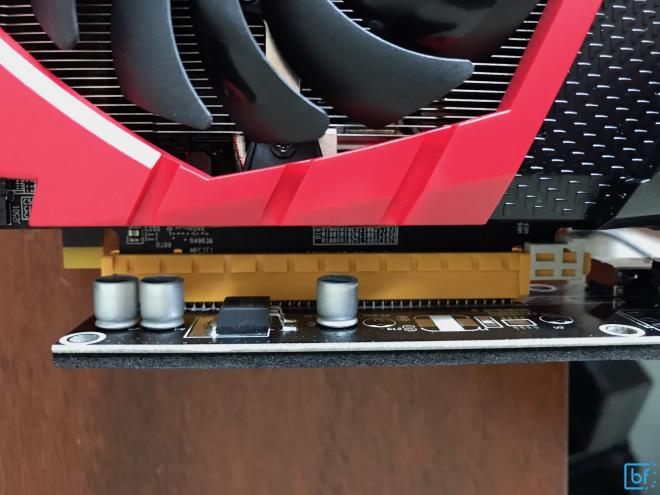
This figure is also a good time to point out the foam covering the solder points on the bottom of the GPU riser board. This is a great feature and necessary for rig frames where the underside of these GPU risers could potential come into contact with a metal part of the frame. Without protection on the underside of the board, solder pins could potentially come in conductive contact with each other and short out and/or permanently damage the GPU. That said, these tend to be stuck on and fall off over time given airflow and heat. These should either be removed, secured another way, or monitored during the first hours, days and months of operation to ensure they haven’t fallen off and obstructed any fans on the motherboard or power supply below.
Mounting GPUs with Risers back to rig frame #
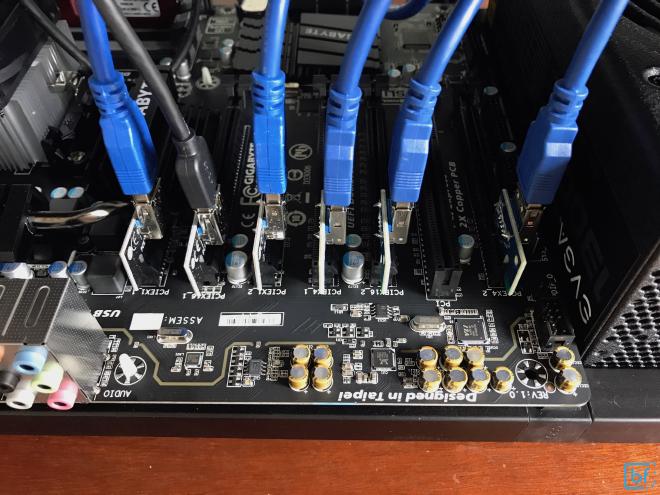
Once you’ve completed the above step with each GPU, you should be re-staging them on the rig frame with the cords dangling below. I recommend plugging the PCIe x1 sides of the GPU riser USBs in to the PCIe slots on the motherboard with the exception of ensuring that a well-known GPU (for instance, the far left GPU when looking at the display interface side of the rig) is plugged into the primary GPU slot on the motherboard. Typically, motherboards will dedicate two PCIe slots to GPUs, and the primary slot will be the topmost PCIe x16 slot (closest to the CPU). The ordering of the rest of the GPUs doesn’t particularly matter. We’ll get to why in a later post about troubleshooting and optimizing.
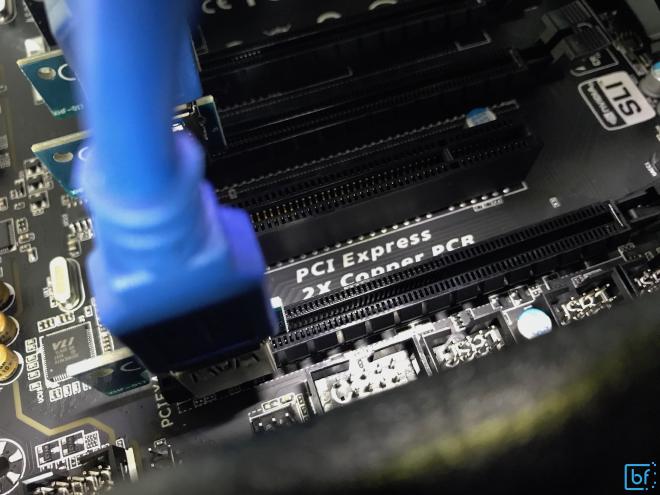
It’s necessary to do this because this will be the default PCIe lane used by the motherboard for providing a display for configuring BIOS and the ethOS OS.
The GPUs will be able to be plugged into the board one-by-one matching PCIe slots like the following figure
Don’t screw anything in yet, leave the GPUs loosely staged so that we can reach everything and optimize spacing when everything is plugged in.
Providing Power to GPUs and SSD #
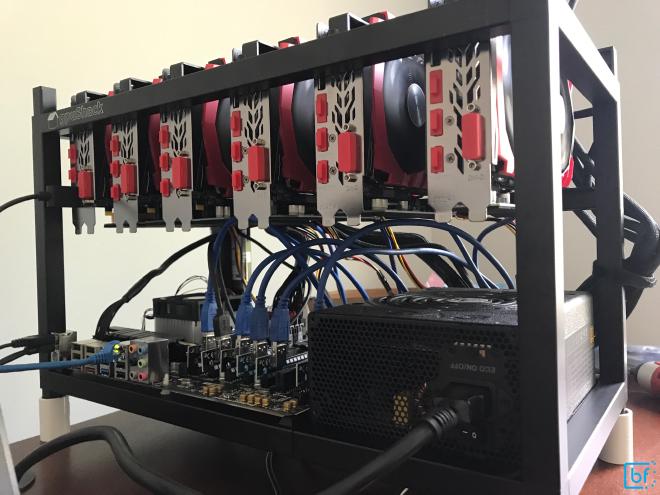
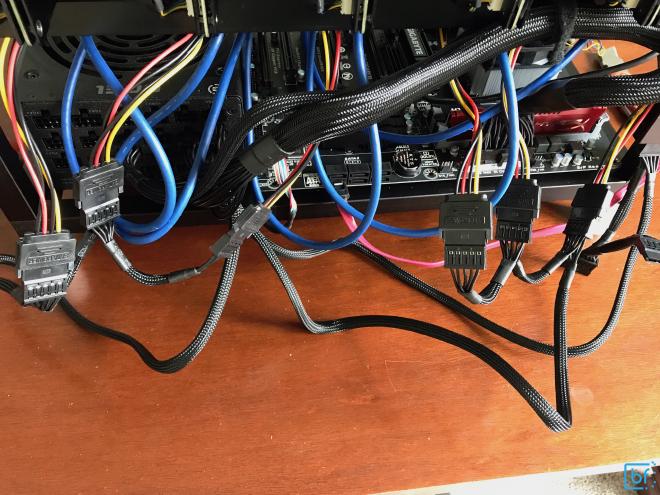
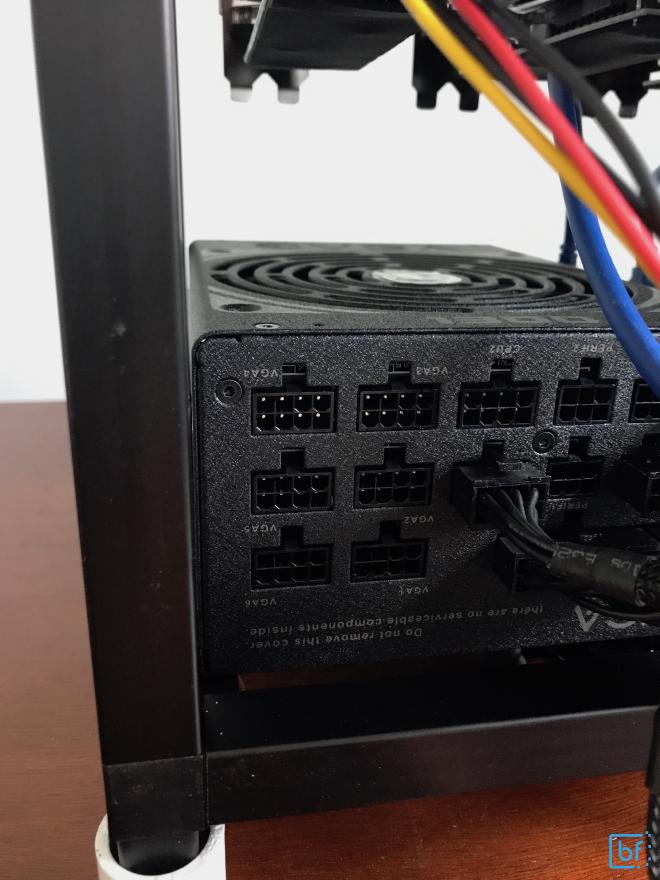
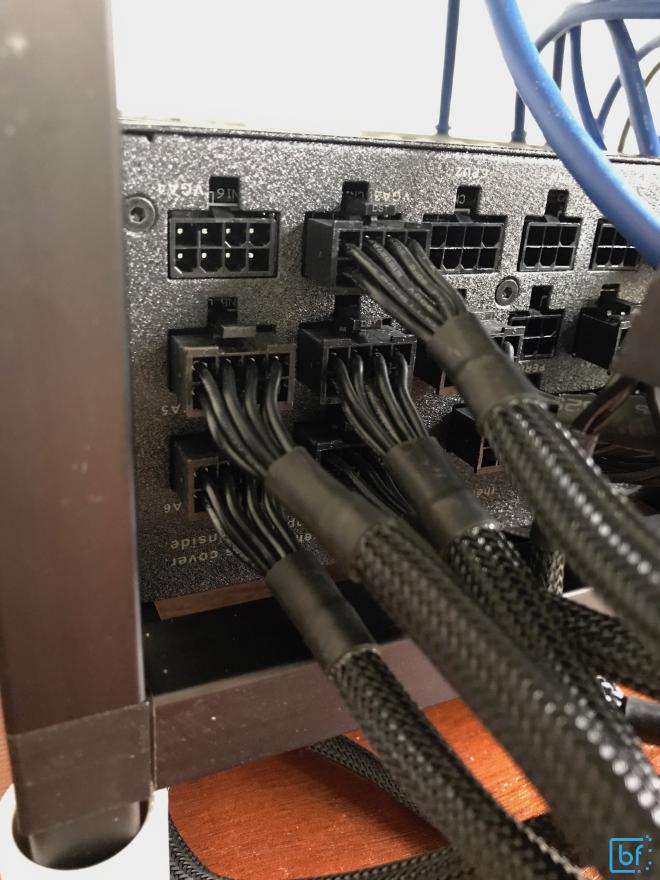
The GPUs will take two kinds of power input. First, they’ll need the GPU riser to be powered through the SATA to Molex connector. This allows the PCIe interface to use reference power from a location other than power pulled from the board. While PCIe is capable of powering from the board through the PCIe interface, the amount of power we’d be drawing from the board for all six GPUs isn’t feasible. As such, we’ll need to get SATA power cables out and attach them to the back of the power supply to the SATA ports and then to the six SATA tails coming from the six GPU risers as well as one additional for the SSD that we mounted earlier in the process. These cables add a good bit of clutter, so do your best to keep them neat.
Here is an image pre plugging in the SATA power cables. You can see in this image that our SATA connectors are hanging down ready to be connected.
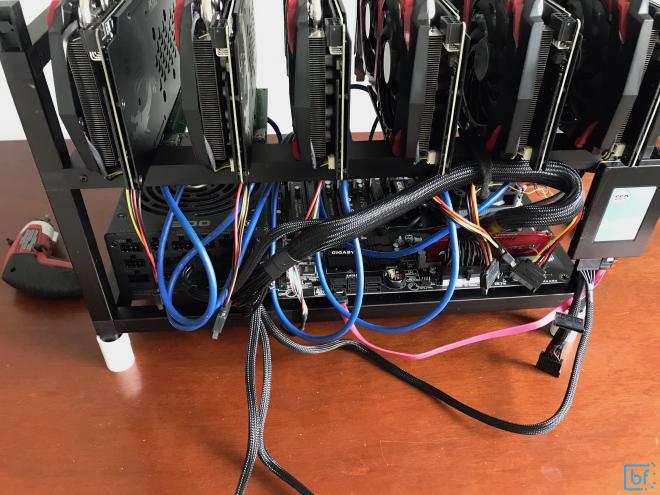
Each of the SATA cables provided with the selected power supply provide three interfaces, so we’ll need three cables to service the seven power demand locations (6 GPUs and 1 SSD).
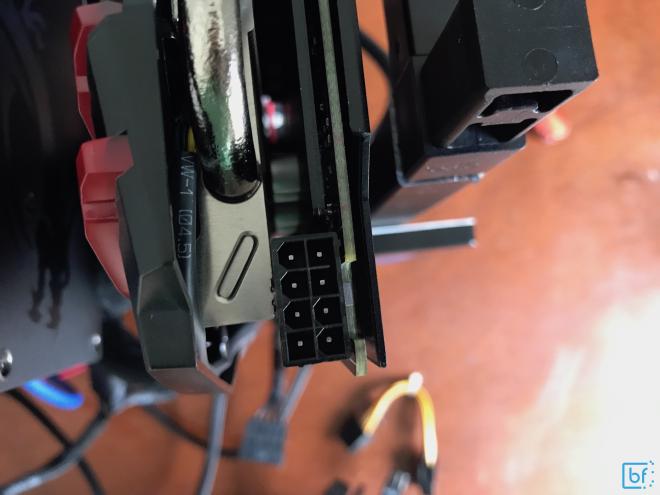
Most modern, high performance GPUs need direct power supply power in addition to the reference power for PCIe. For this additional power, we’ll use the VGA cables provided by the power supply.
Note: It’s a good idea to go ahead and evenly space the GPUs and securely screw them to the rig frame at this point so that they don’t move, slip or float while plugging in the heftier 8-pin VGA cables. Also note, that if you’re using the same GPUs as me, you may need to remove the protective insert from the topmost Display Port on the GPU so that it will fit flush with the rig frame.
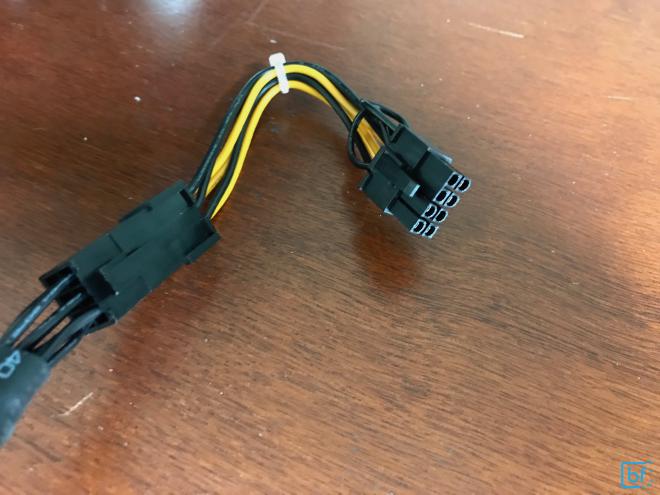
Most of these cables are one-to-one but there is at least one cable included that has two ends from one port on the power supply. However, this cable is an 8-pin on one outlet and a 6-pin on the other. So, we’ll need something to convert the 6-pin to 8-pin interface like the below image.
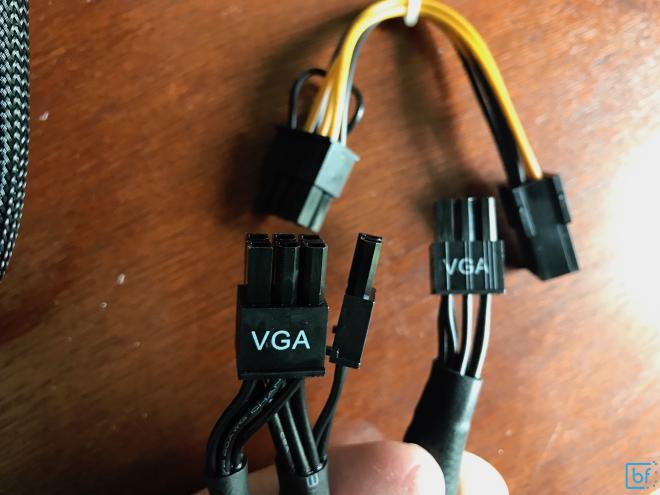
We don’t actually need to use this as the sourced power supply has 6 VGA connections and includes 6 cables. However, I’ve recently started doing this to reduce the sheer mass of cables to reduce airflow constraints.
When connecting the VGA cables, I recommend starting by connecting all the GPU-side connectors first, then plugging the power supply sides in one-by-one next. This allows for a much easier cord organization planning.
Once the GPU sides are connected, we’ll plug them into the VGA power slots on the power supply.
We can then take another Velcro strap from the power supply box and use it to help pull all the VGA cables together and off to the side.
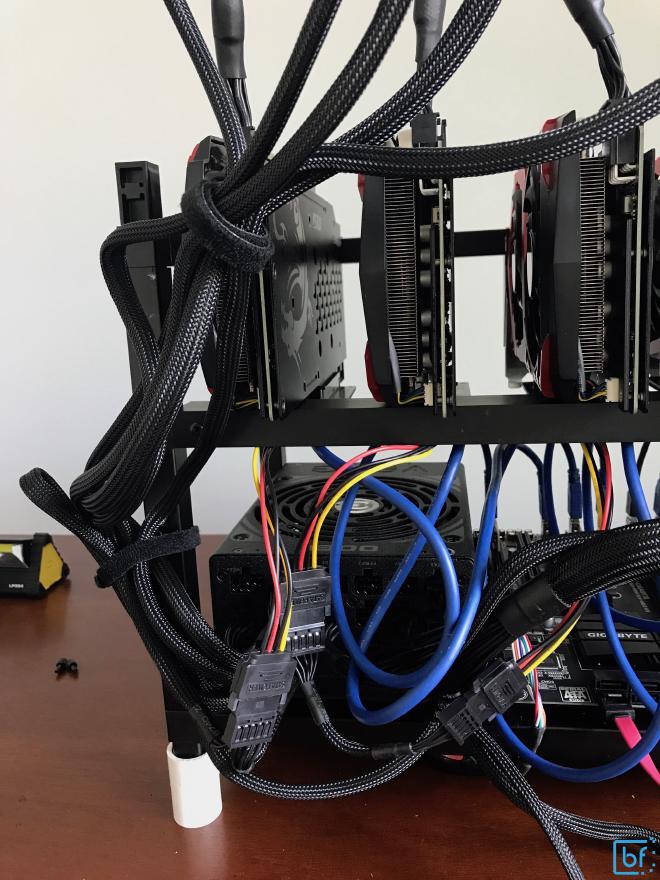
It’s not the prettiest, but it’ll do.
Plugging in the rest #
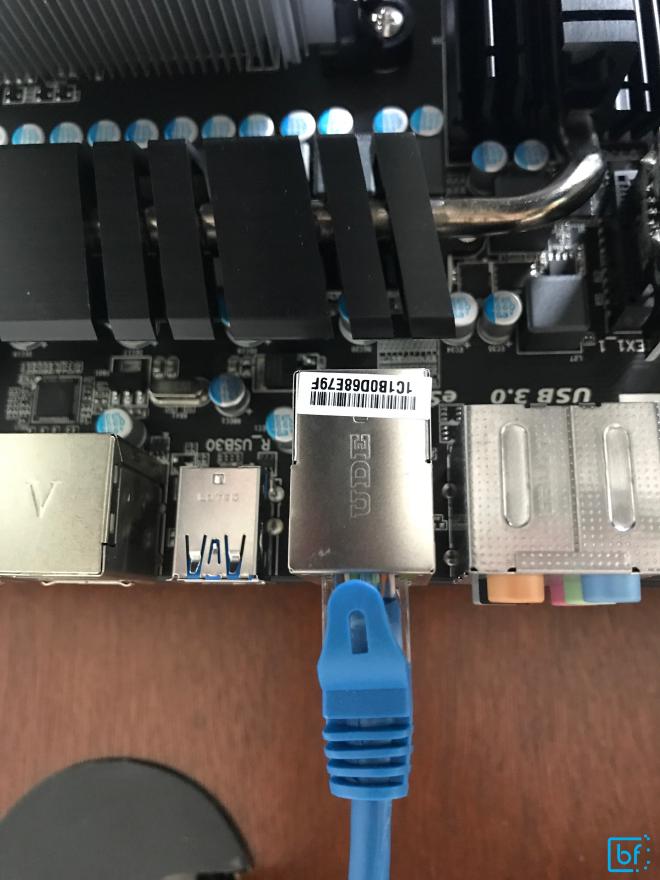
Now on to the simple stuff. We need to plug the power supply into an outlet, plug an Ethernet cable in to the motherboard, and then plug in a keyboard and display to boot and configure.
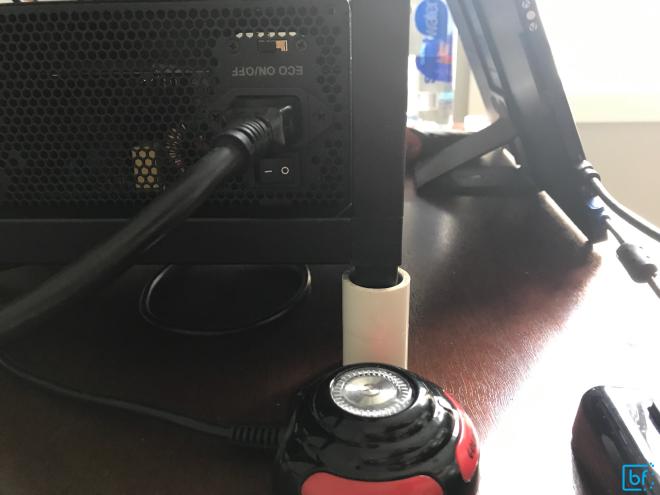
Note that the power supply is still switched off until we have everything ready for first boot.
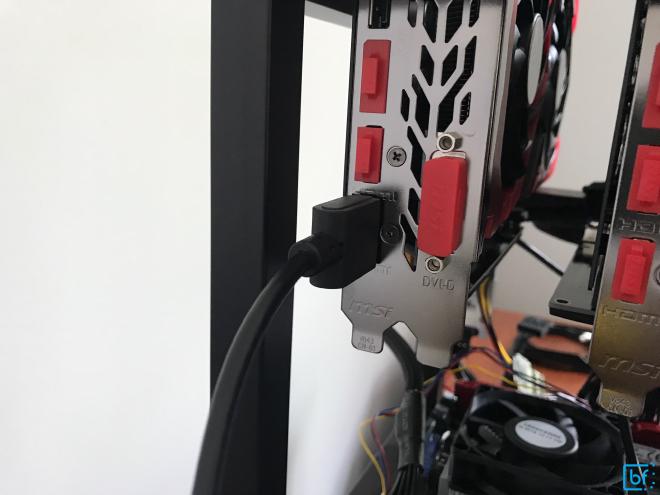
We’ll use the primary display GPU as the GPU to serve as our configuration display.
First boot and BIOS Configuration #
Before we initiate our first boot, we’ll want to make sure that we have no loose connections, everything is properly secured, and there are no open power ports on GPUs, GPU risers or motherboard.
After we’ve confirmed everything is ready for power on, we can flip the power supply switch, man the keyboard and hit that big fancy power button. If the machine POSTs successfully, you’ll see the Gigabyte splash screen with key commands at the bottom of your display.
We’ll want to go straight in to BIOS configuration mode, which is enabled by pressing the <DEL> key while the POST is happening. When you successfully enter into BIOS configuration mode, you should see a screen like the following:
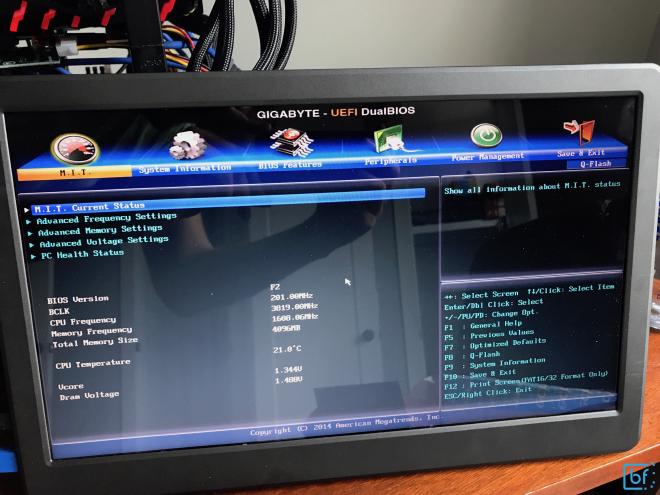
Navigate to Advanced Frequency Settings and then to Advanced CPU Core Features
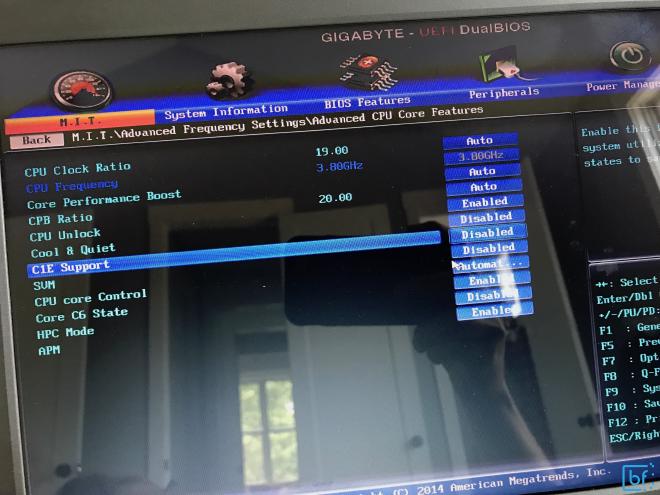
You’ll want to enable CPU Unlock, disable Cool & Quiet, disable C1E, and disable SVM.
Then, navigate to peripherals and disable the on-board audio (since we certainly won’t need this feature and can free up the board resources for it).
Lastly, you’ll want to navigate to Power Management and set the computer to power back on during any power loss. This helps ensure the rig reboots should a power outage ever occur then power return. This is so we don’t loose precious mining time if we’re physically away from the machines to reboot them.
Once our configurations are properly set, we can navigate to Save & Exit and the rig will reboot.
This time, let the rig fully finish the POST screen and - if all is well - we’ll see ethOS start booting. Pay attention to the messages that flash across the screen during this process. You should note that ethOS should identify 6 GPUs for mining and everything should boot smoothly. If it hangs at any screen, watch the drive LED indicator we setup earlier and ensure it’s still flashing (indicating activity) if it’s still flashing, just be patient. Otherwise, if you’ve been patient enough and the flashing has ceased, try rebooting. If the problem persists, check all your equipment and connections.
Once ethOS has fully and successfully booted, we should see a screen that looks like this:
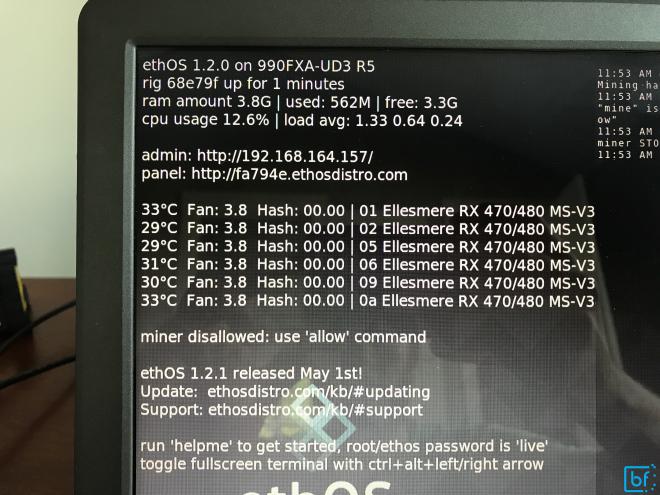
The first thing we’ll want to do once ethOS boots successfully is disallow mining, upgrade ethOS to the latest distro, and then setup our configurations.
# minestop && disallow
This will stop the miner from mining and disallow it from automatically restarting while we do a touch of maintenance.
Then, we’ll perform the update to ethOS
# sudo ethos-update && sleep 5 && r
Note that we’re performing the update, then sleeping for 5 seconds before calling r which is shortened alias in ethOS for rebooting the rig. The 5 second sleep gives us an opportunity to visually inspect the final results for any errors. Then the rig will reboot into the newest ethOS (which at the time of writing this article is version 1.2.2)
Changing the default ethOS password #
ethOS comes preconfigured out-of-the-box with the primary user ethos and password live. We’ll change the password to something more meaningful so we can remotely access the rig for easier configuration in the future. Since ethOS is based on Ubuntu, you can change the password the same way you would Ubuntu:
# passwd ethos
You will then be prompted to put in the current password live and then your own password after that.
Note: If your rig is on a network that you don’t control, I recommend using a private key instead of password authentication. Check out this article for more information.
Once your password has been configured, you’ll be able to access the rig from within your network using SSH (mac/linux) or PuTTY (windows)
$ ssh ethos@x.x.x.x
Where x.x.x.x is the IP address of your rig. ethOS prints this to the final boot screen if you’re not sure what it is.
Configuring the mining rig for mining Ethereum #
For example, I am going to to show configuring using the default pool configurations for Ethereum and ethOS (which at the time of publication is nanopool). However, I highly recommend that you thoughtfully consider which mining pool you implement. For the health of the network, pools should be competitive and decentralized.
If you checked out
my introductory post, I briefly discussed the configuration scheme of ethOS (one of the powerfully simple reasons why I choose this as the mining OS). This configuration scheme essentially boils down to two configuration files: remote.conf and local.conf. For the sake of building a scalable farm operation with remote management, we’ll be leveraging the remote.conf and ignoring the local.conf for everything but debugging.
The remote.conf file located at /home/ethos/remote.conf should contain a simple, one-line url for fetching a configuration file. I recommend using a secured url that has in-url authentication so that ethOS can retrieve the url’s contents simply.
I use GitHub to manage the secure storage of my configurations (and my monitoring applications) and build an authenticated url with the following scheme:
https://<<PERSONAL_ACCESS_TOKEN:x-oauth-basic@raw.githubusercontent.com/<<GITHUB_USER>>/<<GITHUB_REPO>>/master/miner.conf
Once you’ve filled in the blanks of the above url, you can paste this into the remote.conf (I recommend you do this via ssh into the rig).
With the remote.conf file configured with the GitHub CDN url, you can now make sure that your GitHub repo is up-to-date with your latest miner.conf file. ethOS recommends using this as a template: http://ethosdistro.com/pool.txt
I recommend the following custom config for this rig specifically (I’ve removed the unnecessary comments from ethOS recommended config, but you should reference that config for further customizations/explanations):
#custompanel details
custompanel publicsecret # change this to your own custom panel replace

# global defaults ----------------------------------------

globaldriver amdgpu
maxgputemp 78
autoreboot true

globalminer sgminer-gm

# Ethereum Configuratiosn
stratumproxy enabled
sgminer-gm=proxywallet 0xYOUR_ETH_ADDRESS_HERE
sgminer-gm=proxypool1 pool-usa.ethosdistro.com:5001
sgminer-gm=proxypool2 pool-eu.ethosdistro.com:5001
#flags --cl-global-work 8192 --farm-recheck 200

#---------------------------------------------------------

# per rig configs ----------------------------------------

## Mac Address (aa:bb:cc:11:22:33) <- replace with your mac address for ref
## IP Address x.x.x.x <- replace with a static IP if you've configured for ref
# 112233 rx480s [gaming x]
cor 112233 1340 1340 1340 1340 1340 1340
mem 112233 2250 2250 2250 2250 2250 2250
fan 112233 100 100 100 100 100 100
pwr 112233 7 7 7 7 7 7
reb 112233 0
loc 112233 00
miner 112233 sgminer-gm


#---------------------------------------------------------
NOTE: before you set the per rig config section to the overclocking I’ve specified above, I recommend you put x’s in place of each number to let the default clocks take place while you stabilize your mining. These numbers will vary by GPU model, manufacturer and even by similar card based on manufacturing differences. You’ll need to tune these to find the best values.
Once your config is committed and pushed to your master branch in GitHub, you’ll be ready to roll! Check to see if the GitHub CDN has propogated your config by performing the following command from within the ethOS prompt:
# curl `cat /home/ethos/remote.conf`
This should return the config you’ve committed to your master branch in GitHub. If it is not, wait a minute or so and try again. Once you can successfully pull down a config curling the contents of the remote.conf you’ll be ready to allow your miners and reboot the rig.
# putconf && allow && r
Once the rig successfully reboots, watch to see the state of your miner and GPUs go from idle to mining. They should start posting hashrates within 3-5 minutes of booting.
If you’ve setup your mining monitor applications, you’ll be able to go to Initial State and see your rigs getting work done and starting to report earnings!